
Setup Free Local FTP Server Employee Database For Easy Employee Check-In
Using a local FTP server employee database for your organization’s employee roster is simply smart. Employee information is updated frequently–especially with larger organizations. Maintaining this list up-to-date is something that will be done with your access control system and doing it frequently can be tedious. Cloud-In-Hand® (CIH) Attendance Management can automatically pull this list from an FTP server. Exporting the roster/database to an FTP server gives CIH Attendance access to the latest roster. You don’t need to own an FTP server. Setup your free local FTP server using option like FileZilla. Automated updates makes Employee Check-in a breeze. Employee changes and badge updates are automatic once it’s set up. Here you’ll see how to setup your free local Local FTP Server Employee Database and connect it to your CIH account:
Get the FTP Client App
Step 1: Complete the installation process and open up the FileZilla client. The FTP can be setup to always start when the computer starts if you prefer manually.
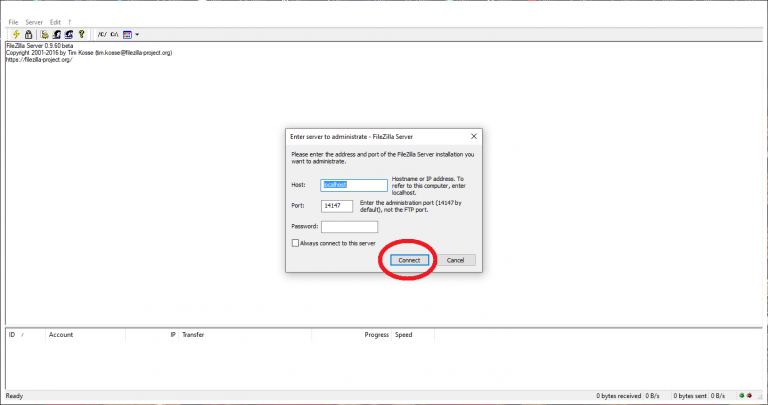
Step 2: You will be prompted with a window to set the hostname or IP address. By default, this should be “localhost.” The menu will also default the local administration port of “14147.” Both of these settings can be left alone. Right now, there is also no password set so you can leave this blank and press connect.
Step 3: Now, you’ve arrived at the main window. We need to set up users and the shared FTP folder which will be on your device. Select Edit in the top left and click “Users.”

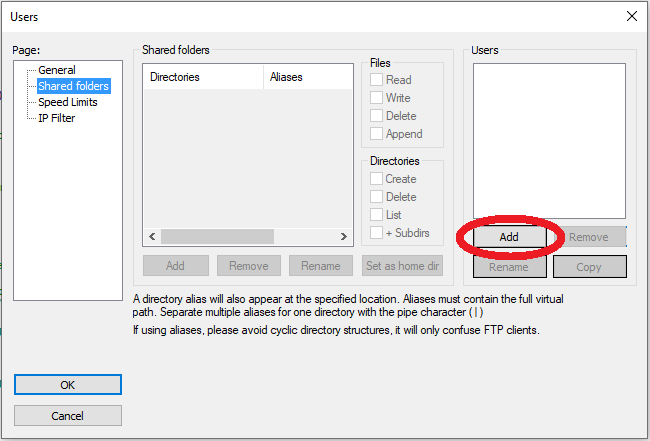
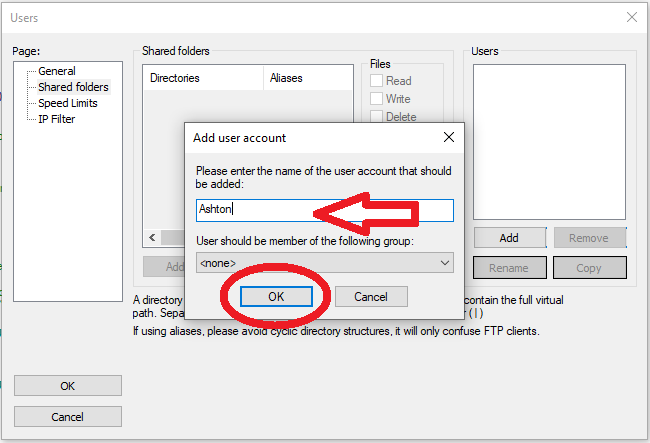
Step 4: From this menu, select “Shared Folders” from the page menu on the left. Then, under the “Users” section on the right, press add. From here, type the name of the username you want to add and press “OK”
Step 5: After the user has been added, next designate the shared folder. Note, this folder will be on your computer and accessed via external connections through the FTP. It’s recommended to create a dedicated folder for this step somewhere on your computer–it’s not important where as long as you can access it. Under the “Shared Folders” section, press “add” and select the folder you have setup to be the shared folder then press “OK.”
Setup FTP Folder Permissions
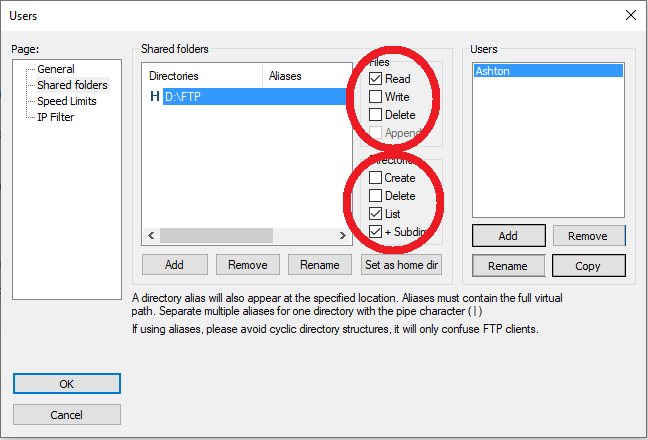
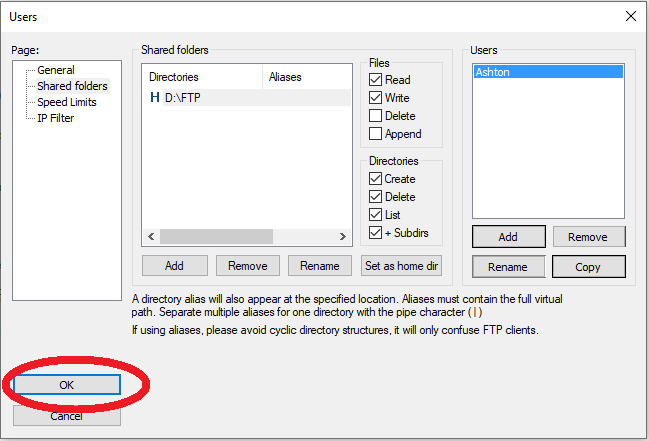
Step 6: With the folder setup, we’re ready to set the folder permissions for the user(s) you have created. Select the user you want to set permissions for and then select the shared folder you have added. From here, check the “Write,” “Create,” and “Delete” from the FIles and Directories menu to the right of the “Shared Folders” menu.
Step 7: Once you have your user(s) and shared folder setup, press “OK” then proceed to connecting to the FTP folder.
Connect to the FTP Folder
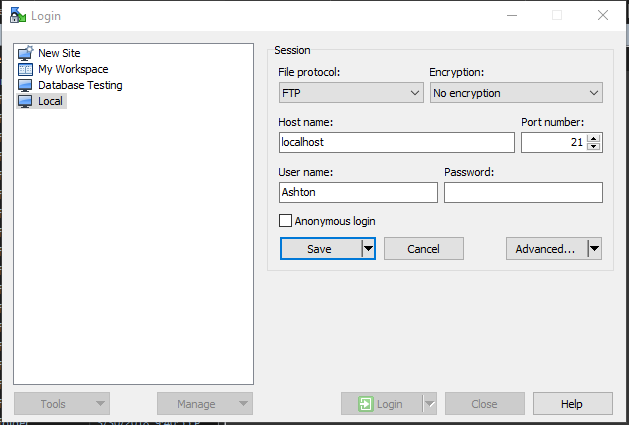
Step 8a: From here, we’ll use a client to connect to the FTP folder and access the Local FTP Server Employee Database. This example uses a file manager program called WinSCP. Download this program or use your preferred file management system to enter in the FTP server settings. Once you’ve downloaded your file management system, open it up and add a new site. Set the File Protocol to “FTP” and Encryption to “No Encryption.” If you’re connecting from the same computer the FTP server is running on, you can use “localhost” for the Host Name. Otherwise, if you’re wanting to connect to it from another machine, you’ll need to use the external IP address of the machine running the FTP server as the Host Name.
IP Address and Connection Port
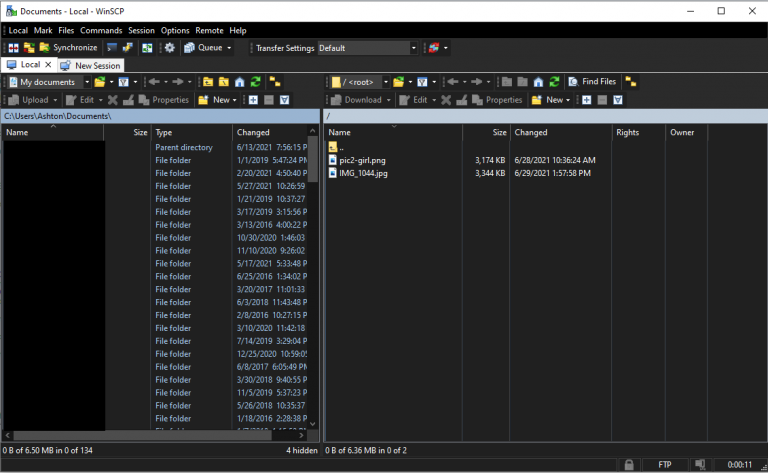
Step 8b: To find this external IP address, you can simply google “What’s my IP address” from the computer where the FTP sever is running. Regardless, the default port should be 21. Last, type in the User Name for the user you set up earlier and press Save. Now the setup is ready to connect and upload employee roster files. You can simply drag and drop your Employee Database onto the FTP. Once a file is uploaded, you can check the folder you created from the original machine and see the file in that folder. If you’re having trouble connecting, ask your IT team about what ports are available to use.
Step 9: With the FTP Server setup and your connection successful, we’re ready to put the details into Cloud-In-Hand. Log into Cloud-in-hand, go to the accounts section, and select DB FTP.

Setup File Management Credentials
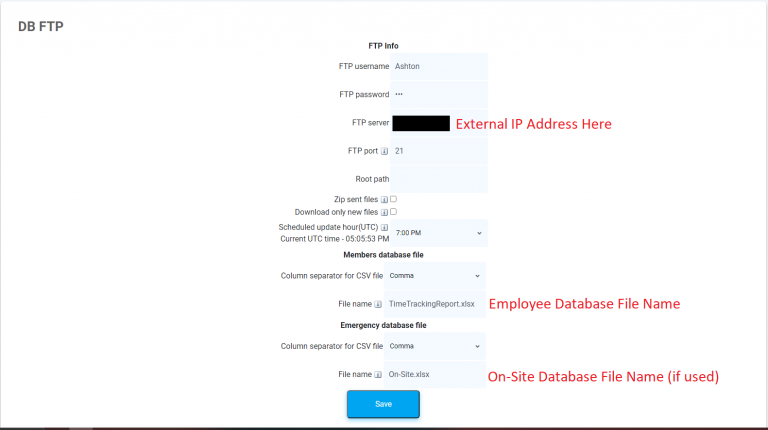
Step 10: All that is left to do is to put in the same credentials you used in your file management system to access the FTP. For accessing your FTP with Cloud-in-Hand you’ll need to use the external IP address mentioned in Step 8 for the FTP Server. If your FTP does not have sub folders then you can leave the “Root Path” section blank. The last part you need to fill out is the Member Database “File Name.” Make sure the file name on the FTP that includes your personnel names and badge IDs is the same as what you put into the Cloud-In-Hand web portal. If you plan to use stratus-io and Cloud-In-Hand for emergencies, you can also regularly upload your on-site database list and put the file name in the “Emergency Database File” section. Finally, press save.
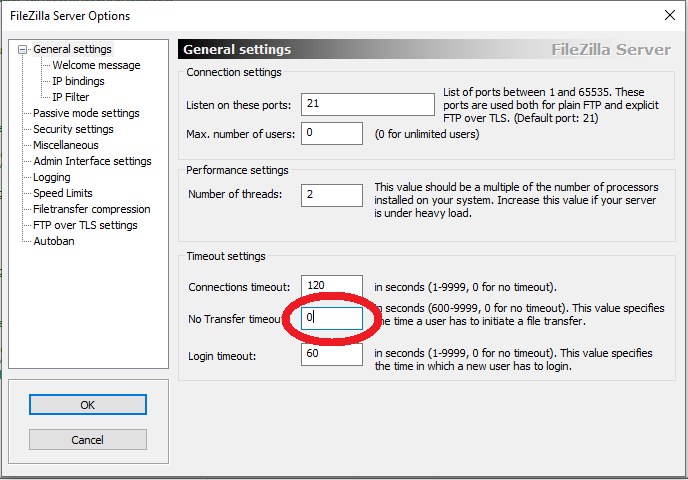
One last thing to mention… The Local FTP Server Employee Database will automatically disconnect after a time of inactivity. To keep always connected, disable this. Use Edit > Settings > Clicking “General Settings.” From here, set the “No Transfer Timeout” setting to 0 and press “OK” in the bottom left.
You're All Done
Let Us Help You Deploy Quickly
Deploy stratus-io anywhere, anytime. This how-to shows one of the many powerful Time and Attendance features. Using a Local FTP Server Employee Database to ease updating the Employee roster database. Accounting for people inside your facility at any time, is also a popular feature provided by stratus-io Time and Attendance. Free trials are available by clicking the button below. Ask about current and new functionality that ensures your business is equipped to track personnel for their safety and your compliance.
stratus-io works with all your existing credentials as a great extension to your existing systems or can be used entirely on it’s own as an end-to-end solution. Deployment can be a headache. stratus-io powered by Cloud-In-Hand: Solutions Platform is a gamechanger. Deploy in hours not weeks. Get your free trial today and let us show you why we’re the best.